It's time to make your own RSS reader
One RSS reader, on every device you own, no algorithms invited.
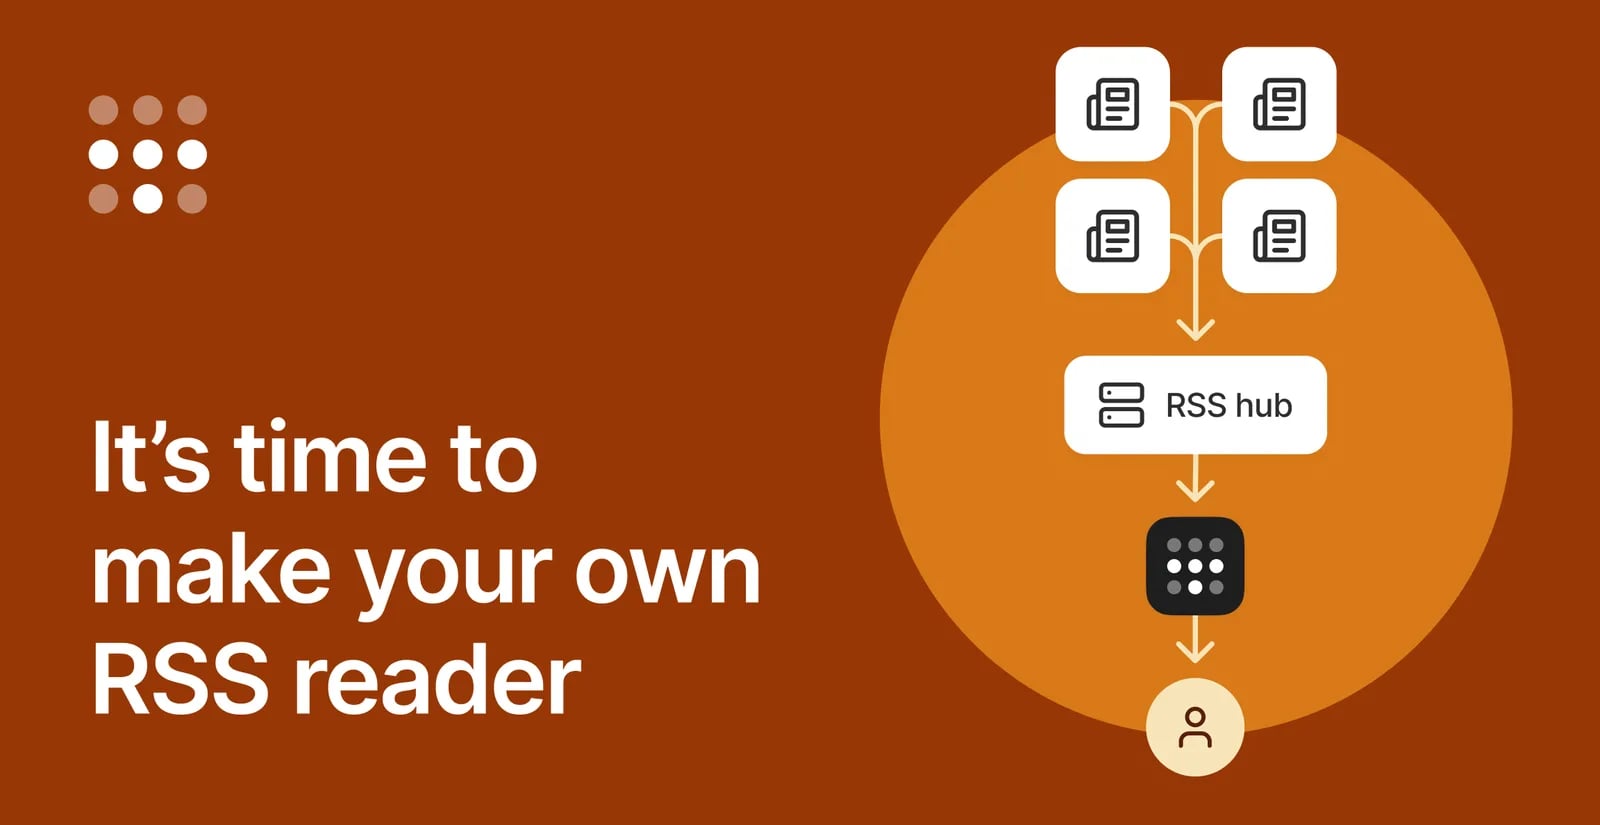
It may not feel like it, but there is still a way to read things online that humans have written, chosen and sorted by you, not an algorithm. That way is RSS (Really Simple Syndication). You can self-host one for free, and you can use Tailscale to set up one reader you access everywhere.
Why would you tackle this almost retro-feeling project? Maybe you’d like a bit less doom in your scrolling. Perhaps you’re sick of attention-optimized designs, barely differentiated sponsored content, or seeing the same "news" suggested to you 12 different times. Or, this being 2026, you might want to feed an AI agent a focused feed so it can pick out highlights.
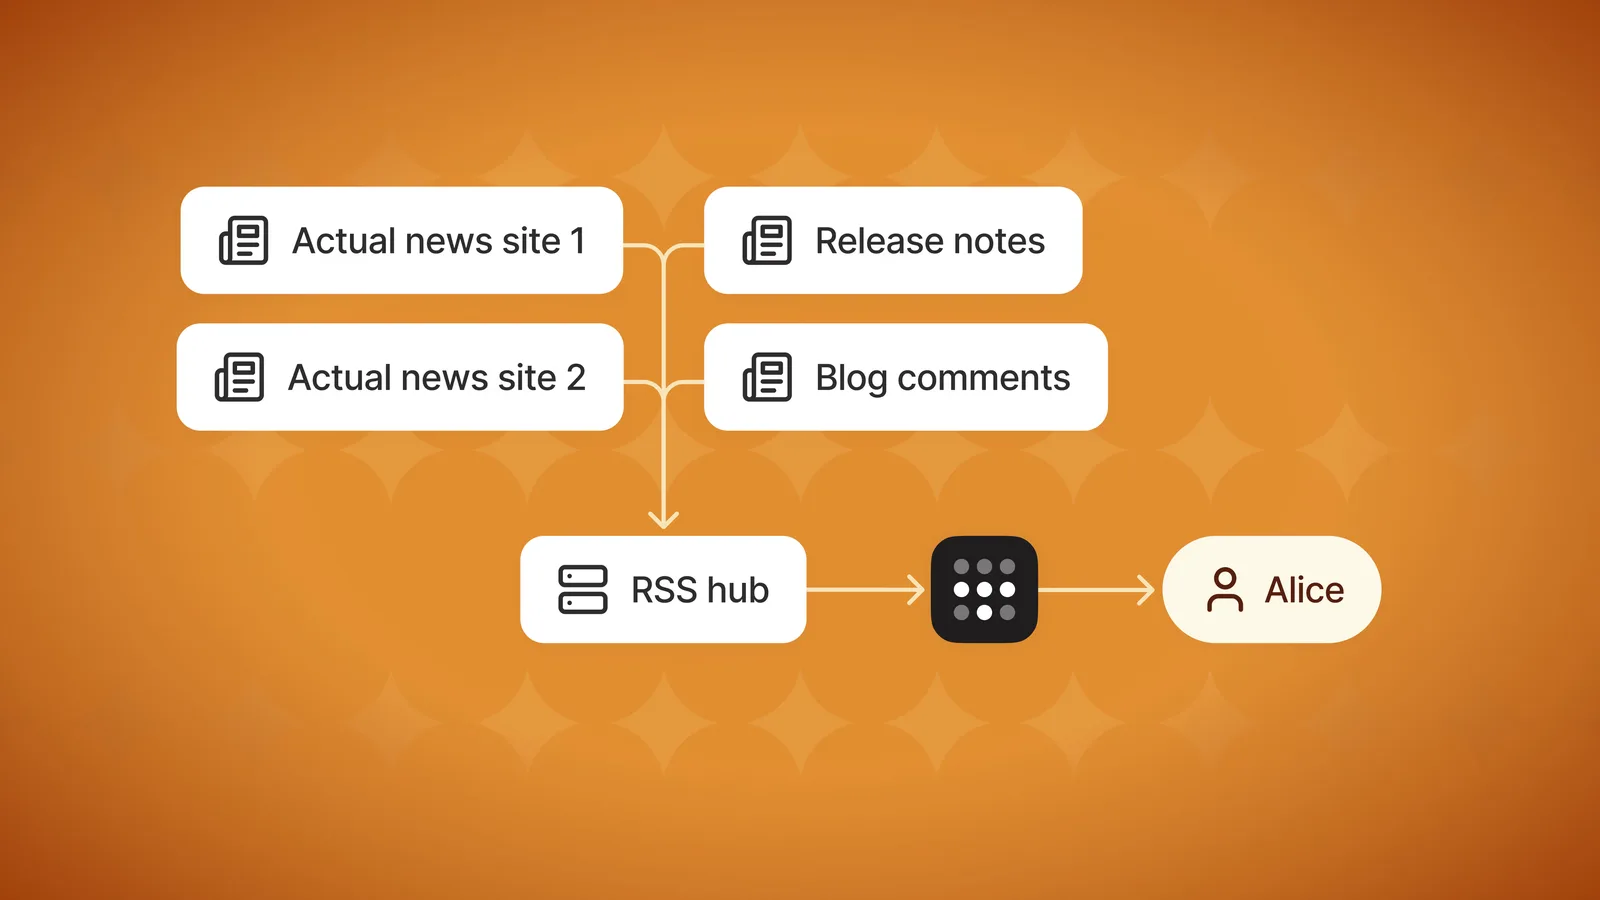
This post will walk through setting up FreshRSS, which works as both an RSS aggregator (the hub that fetches feeds) and a reader (shows you feeds’ content). It’s one of the easiest things to self-host, whether or not you have hardware for it at home. And we’re giving FreshRSS its own secure URL through Tailscale, so nothing is exposed on the open web, but you can reach it easily.
RSS is the non-algorithmic fix: you choose what sites to follow (and sometimes individual topics or authors), and then you get their posts. Use RSS a few times to get your awareness hits, and it’s hard to go back to anything else. It has an indie feel to it, because this kind of personalized, information-dense style of reading was never going to be the default. Which is fine and, frankly, it rocks.
Before any of this setup, you need a Tailscale account. The Personal plan is free, gives you unlimited devices and multiple users, so you’re well covered for this little news-reading project.
Set up Docker for FreshRSS
We’re doing this with Docker because Docker is what the FreshRSS makers want you to use. If you’ve never set up a Docker container before, it can sound like a lot. But we’re starting small, with a setup file that bakes Tailscale right into it. Using Docker, the install instructions for FreshRSS will be quite similar for everybody, whether deploying on a virtual private server (VPS), an old laptop, a Raspberry Pi, or a Mac mini.
Here’s the least painful way forward.
- Grab the desktop app on Windows or Mac. If your always-on machine runs Windows or macOS, grab the Docker desktop app for that system. Install the app, launch it, and keep following along.
- Open a terminal. On a Linux system that doesn’t have a desktop (like a VPS), you’re already at a terminal (a "shell," technically). If you’re on Windows, launch Terminal (or PowerShell, they both work), and on macOS, just Terminal. On Raspberry Pi OS, or another Linux system with a desktop, look for a terminal or "term" app and open it.
- See if you’ve already got a recent Docker install. Type this into your terminal and hit Enter:
docker compose version. If it returns any version, then you’re good to keep moving. If not, enter this script, which will install and update Docker on nearly every major Linux system:curl -fsSL https://get.docker.com | sh. Log out of your Linux system, then log back in, and now you can use Docker without typingsudobefore important commands. - Fix your permissions: If you didn’t run Docker’s script, enter this command in your terminal to allow for performing key Docker functions:
sudo usermod -aG docker $USER(noting the upper-case G). Then log out and log back in, or runnewgrp dockerto set yourself in the right group. - Test everything’s working: Enter
docker run hello-worldin your terminal to pull a test image.
We’ve covered setting up Docker, and spinning up containers, in a YouTube guide to getting started with Docker and Tailscale. Alex’s video examples may be helpful, if anything in this blog guide isn’t quite clicking.
Create a Docker directory
Make a directory on your device (or VPS) where you’re going to keep Docker containers, such as FreshRSS setup. It’s a good idea to plan for future projects, and an even better idea to put it in your home directory. On Linux and macOS (and a VPS with SSH access), that looks like this:
mkdir -p ~/docker
The
~
there is a shortcut for your home directory, so that’s actually
/home/username/docker
, swapping
username
for what you use. On Windows, in PowerShell, it’s
mkdir $HOME\docker
.
Download ScaleTail’s FreshRSS project
ScaleTail is a repository full of containers all set up to launch and add themselves to your Tailscale network (tailnet). I’ve added FreshRSS to the ScaleTail repository. You’re going to download this directory, make a couple changes to a configuration file, and launch the container.
If you’re on macOS or Linux, you can, using the
git
command, clone the whole ScaleTail repository (it’s tiny), then head into the FreshRSS section to work with it:
      cd ~/docker
git clone https://github.com/tailscale-dev/ScaleTail.git
cd ScaleTail/services/freshrss
Some macOS users will be prompted to install the "Xcode Command Line Tools." Do so; you’re obviously a developer now.
If you’re on Windows and the
git
command failed, I’d suggest not installing Git into the PowerShell window; it’s more trouble than it’s worth. Instead, download a ZIP file of the ScaleTail repository. Move the ZIP file into that
docker
folder you made in your home directory. Unzip the file there, and it should create a directory,
ScaleTail-main
. From there, you can head into
ScaleTail-main/services/freshrss
. (For the rest of this post, whenever the directory
ScaleTail
is used, use
ScaleTail-main
instead).
Now let’s set this package up to connect through Tailscale.
Grab and set your key and variables
If you haven’t already, create a Tailscale account, and install it on the device with the Docker setup. Once Tailscale is running on that device, you can access it from any other device on the tailnet. That makes it a lot easier to get back into this machine for troubleshooting, particularly if it’s a device without a screen and keyboard attached. You can later set up Tailscale SSH for even easier access.
On Tailscale’s web admin console, head to Settings > Keys. Click the Generate Auth Key button. Give the key a name, like
freshrss
. If you see a "Pre-approved" option, toggle it on.
Click Generate key, and copy the key—don’t close the window while you do this next part.
Inside your
~/docker/ScaleTail/services/freshrss
directory, there is a file,
.env
, where we need to add our key value. If you have a preferred text editor, open up the
.env
file with that. Otherwise, on macOS and Linux, you can run this command:
nano ~/docker/ScaleTail/services/freshrss/.env
That will open up the
.env
file in a very minimal, terminal-based editor,
nano
. Use the arrow keys to get to the line
TS_AUTHKEY=
, then put the cursor right after the
=
bit. To paste it, use Command+V on Mac, or Control+Shift+V on Linux. The line should read
TS_AUTHKEY=ts-abcxyz …
.
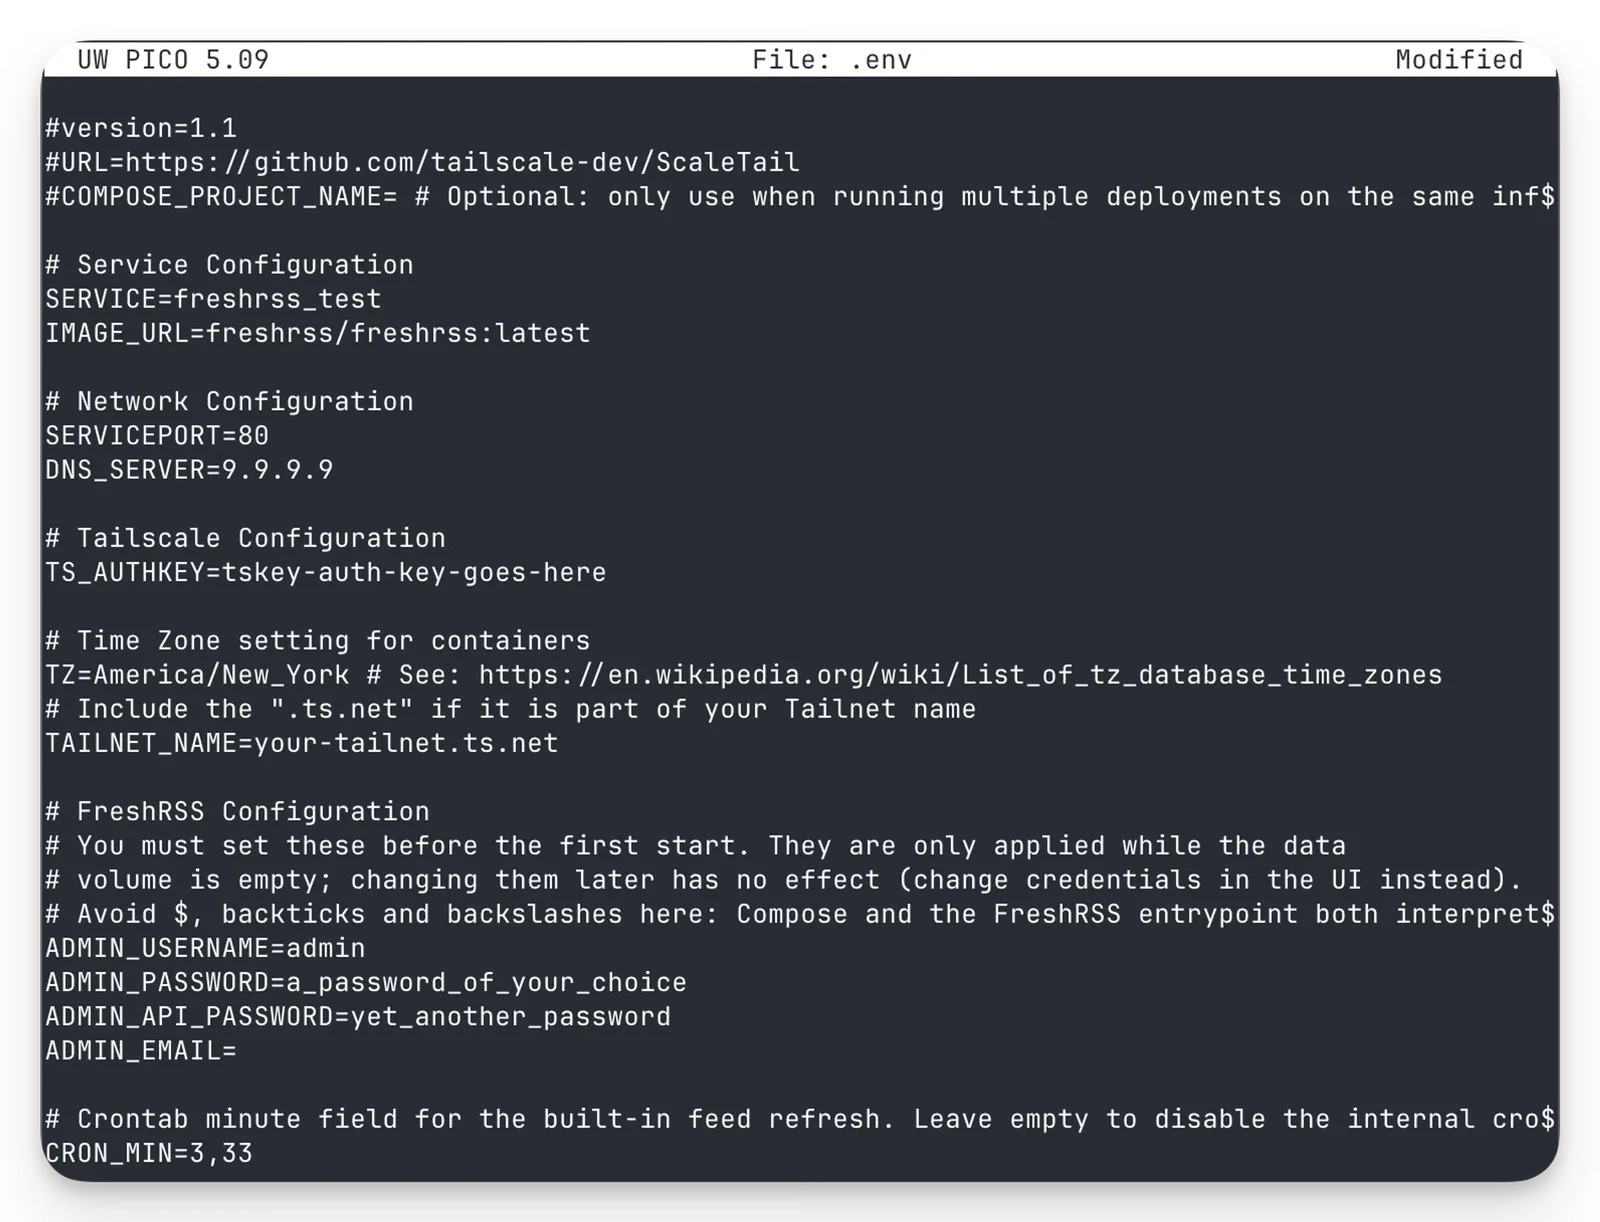
Don’t close the file after you’ve pasted your key; there are a few more edits to make. On the line
TZ=
, you enter your time zone after the equals sign, using the “tz” format, like
America/New_York
.
For
TAILNET_NAME=
, head to your web admin console’s DNS settings to see your Tailnet DNS name. If you haven’t already, you can click Rename tailnet to get something more memorable than the default jumble of letters and numbers. If this is your first container on Tailscale, it’s a good time to roll for a new semi-random name. Either way, paste in the part showing in your console, like velociraptor-noodlefish.ts.net.
Next to
ADMIN_PASSWORD
, and also
ADMIN_API_PASSWORD
, enter something sensible. These secure access to your FreshRSS dashboard, and then external access to its feeds and data, respectively. Set
ADMIN_EMAIL
to, most likely, your own email.
Finally, if you want this to show up on your tailnet as something other than a node named
freshrss
, change its name on the
SERVICE=
line near the top of the
.env
file.
Once you’ve pasted the key, time zone, tailnet name, passwords, and email (whew!), enter these commands: Control+O ("Write out," or save), Enter (to confirm the file name), then Ctrl+X (exit).
On Windows, your best bet is using Visual Studio Code (VSCode). Install it for your system, then use it to open the
.env
file in your
docker\ScaleTail-main\services\freshrss
directory. Make all the edits noted above: auth key, time zone, tailnet name (optional), passwords, and email. Do a little check in the bottom-right corner of VSCode to ensure it reads
LF
; if it reads
CRLF
, change it to
LF
(“Linux file endings”; it’s weird), and then save the file.
Launch FreshRSS
Time to launch our hub. In a terminal, make sure you’re in the directory where you put that
.env
and
compose.yaml
file (
cd ~/docker/ScaleTail/services/freshrss
if you used our layout earlier). Once there, enter:
docker compose up -d
. This tells Docker to use your compose file to bring a container "up," or set it running; the
-d
is "detached," meaning it keeps running when you eventually close this terminal.
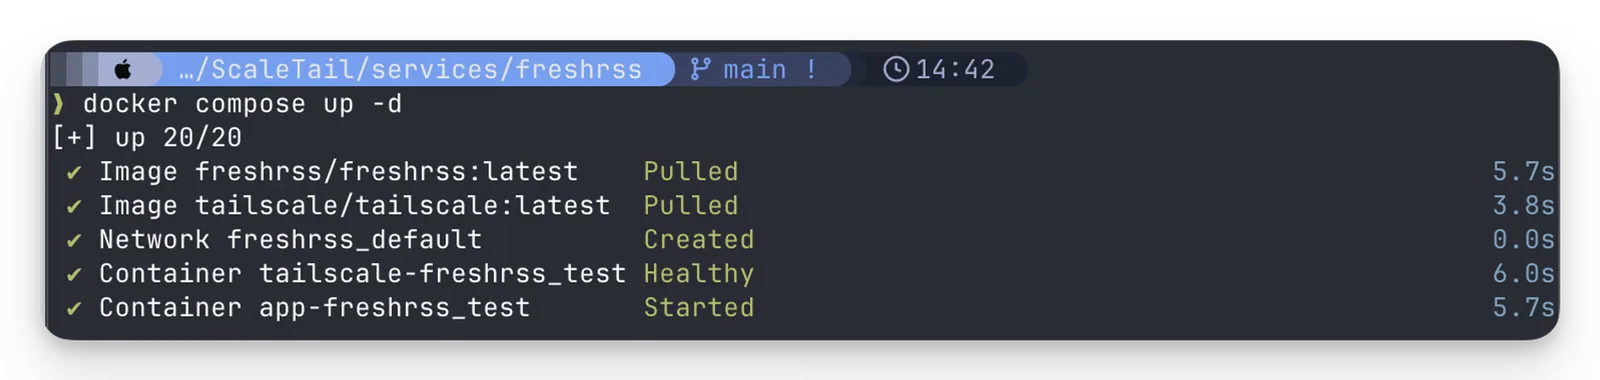
You should see Docker pull images, create networks and volumes (virtual drives), and start each container. Did they work? You can check with
docker compose ps
, which shows the status of each container. The
tailscale-freshrss
should eventually be
healthy
and
app-freshrss
reports
running
. If not, try checking in with
docker compose logs tailscale
. If you see lines about a key or "auth" being expired or invalid, try creating a new Tailscale key, placing it in the
.env
file, and running
docker compose up -d
again.
Once FreshRSS is running and healthy, and Tailscale is installed and connected, open a browser and head to
http://<device-name>.<tailnet-name>.ts.net
. Substitute your device/key name (like
freshrss
) and your tailnet name, like
noodlefish-velociraptor
(found at the admin console’s DNS settings).
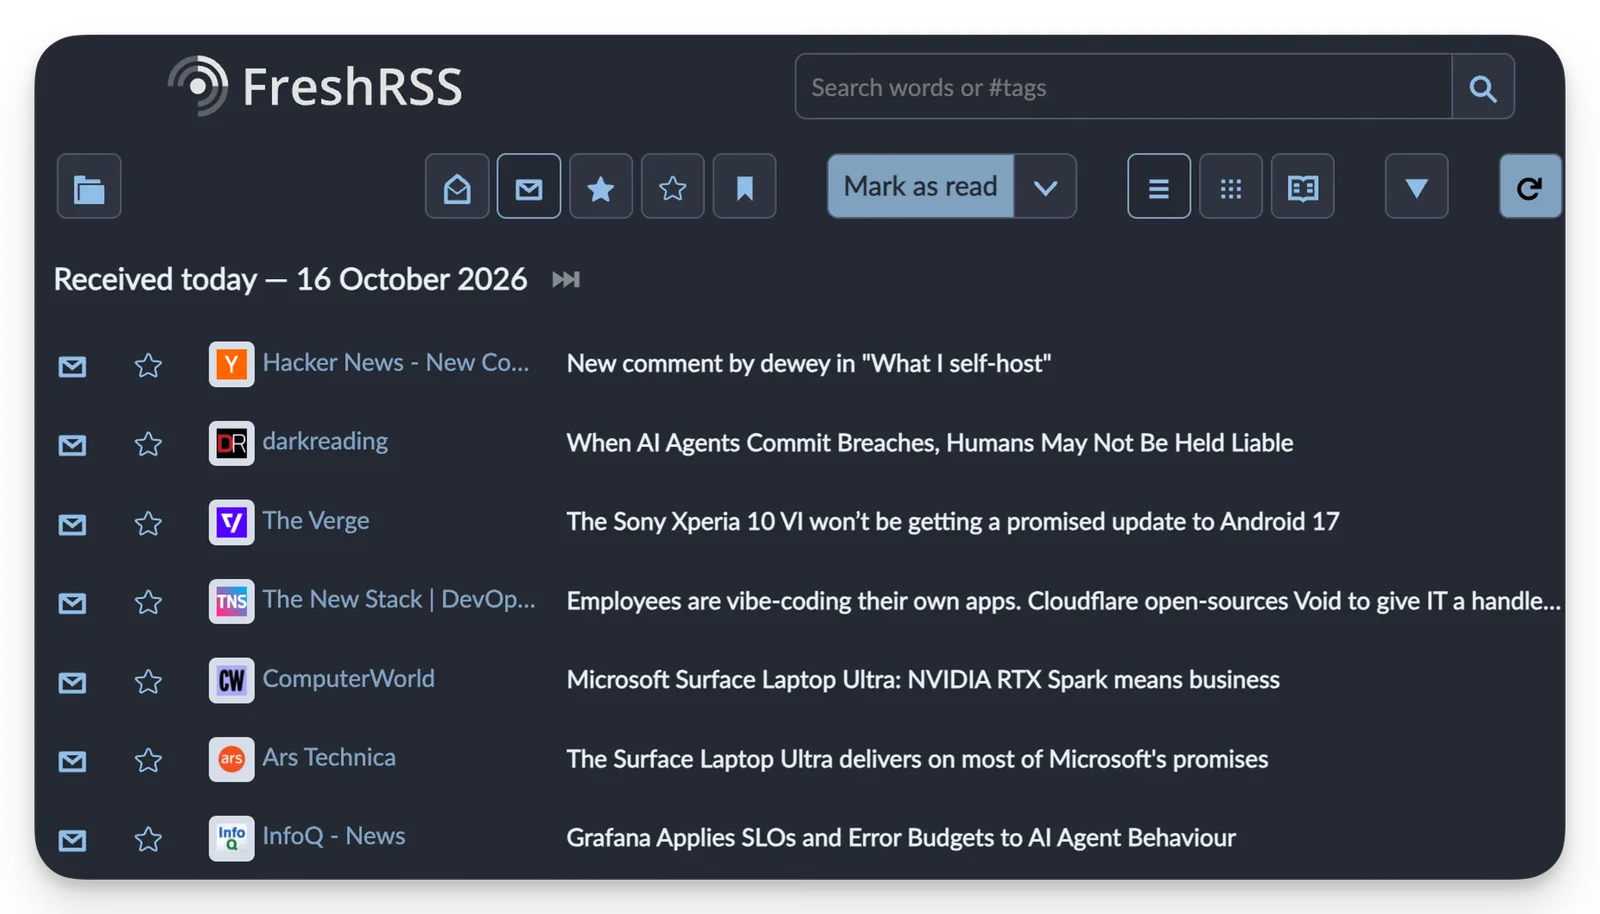
Set up FreshRSS
Load up FreshRSS in your browser, then log in with that username/password you set up in your
.env
file.
You’re in. You’ll need to gather up your feeds. Often, you can paste the base URL for a website into FreshRSS’ "Add a feed" box and it will automatically find the RSS.
If that’s not working, scroll to the bottom of sites you’re interested in, and at the bottom, you’ll often find links to RSS or Feeds. Sometimes they’re only on the blog or news sections of a site. The EFF’s guide to RSS has good tips on curating a list of feeds, including from social sites, YouTube, Reddit, Tumblr, and other spots.
Use other readers (and AI) with FreshRSS
Want to use FreshRSS with NetNewsWire or another reading app? Want to expose it to AI agents, so it can scan your feeds and alert you about the most relevant news? You’re a few clicks away.
In FreshRSS Settings, head to the Authentication section. Check the box for Allow API access and click Submit. Next, under Profile in Settings, scroll down a bit, and you should see that an API password was set (in your
.env
file). If not, set it here, then hit Submit.
Setting up this API allows you to hook up NetNewsWire, Reeder, FeedMe, and other apps to FreshRSS. In NetNewsWire, go to Settings > Add Account, head to the Self-Hosted section, and choose FreshRSS. Give it your API URL, which is either your tailnet address (
https://freshrss.<your-tailnet>.ts.net/api/greader.php
) or local URL (
http://<IP-address>:8080/api/greader.php
). Then add your username, and your API password (not your web login password), and you’re off and reading.
Want to hook up Claude, ChatGPT, Hermes, or other LLMs to your feeds? It’s the same API URL, where your agent can POST your username and API password to get an auth token, then get to work.
Now you’re reading with power
I have an LLM reading my FreshRSS feeds and making a digest of the most relevant items in Tailscale’s tech sectors, twice a day. It catches interesting stuff and contextualizes it. But it’s even more effective at nudging me to head into the full feed list, to both catch all the stuff I didn’t expect to see, and catch up on more news and updates further afield.
The death of Google Reader, a seminal moment for Internet writers, readers, and enthusiasts, was not the death of RSS. It might have marked a major shift in how distributed and open the web felt to most people; it should have served as a wake-up call. If you want something better than whatever is targeted to your web habits, you have to do a bit of curation. You have to find and sort your own flavors of thoughtful takes and surprising rabbit holes into your feeds. It’s seed work that pays off over time.
Go forth and gather up some feeds, and keep them on your own network.
منتشرشده در
Tailscale Blog
ادامه مطالعه
 Docker Blog

 Vercel BlogDocker Blog